When I was working in my previous job, I used to develop in a remote VM, with VS Code connected to it with SSH. One day, after leaving the job, I like to start a new project and I just realised I do not have access to the previous environment anymore. Now I would need to setup my own development environment. I have considered several options and the final decision goes to AWS. Here are the options I have ever thought of.
Local machine with docker or VM: I do not like “polluting” my own machine with running a few background processes. I am using the Macbook Pro 2016 with 16GB RAM. This was pretty good enough when I bought the machine. But now, it is getting slower, a bit laggy even when I am just browsing some simple websites. Since I need to run the notoriously resources exhausting webpack, I would like to offload the development environment to another machine.
Raspberry Pi: I got a few Pis but since it is ARM based, I am afraid that I would encounter any compatibility problem. So I would like to stick to the x86 eco system.
Cloud based environment: I live in a place where most of the cloud service providers do not provide service. So there are limited choices. I have considered using LightSail from AWS, but eventually go to EC2 + EFS.
The setup I am going to use
Let me jump to the final setup I am going to use. I will share how I come up with this setting soon.
- EC2 (spot instance)
- EBS for hosting the OS
- EFS for storing the project files
Usage analysis
To understand why I have this setup, let me share my work pattern with you (I think most developers have a similar usage pattern?). I use docker to host my web projects in the development VM. Previously in my job, I have more than 30 projects in the VM. However, among the 30 projects, most of the time only 2 – 3 were active projects. The other 2x projects were in “maintenance” mode. That is, I will only access those files once every month, or even 2 months.
For the system files, I almost have never touched them after the initial setup. Unlike my old setup, i.e. using nginx as the reverse proxy in front of other docker projects, I use the image jwilder/nginx-proxy to automate the setup of reverse proxy. So instead of putting the settings under /etc/nginx, I rely on docker to manage the settings.
A short summary of the usage:
| Files | Access frequency |
| Active project data and files | Many times every day |
| Inactive project data and files | Once every month |
| System files and settings | Once a few months, or less |
| docker data | Many times every day |
Solution
In the AWS bill, there are a few parts that contributes the most significant cost. Among those parts, the computing unit (i.e. EC2) and the storage (i.e. EBS) are the most significant. The network transfer part can be ignored most of the time. Hence, based on the usage pattern, here is what I come up with in order to minimise the cost.
EC2 (spot instance)
LightSail is a potential choice for me but I have chosen EC2 eventually. It is because even if I turned off (stopped) the machine, LightSail will still incur a charge. Since I work only 8 hours a day, there are almost two-thirds of the charge wasted. I prefer a pricing model that don’t charge me anything after I stopped the machine.
I can simply use an on-demand EC2, which fits the pricing model I am looking for. However, since spot instance is even cheaper, I decided to use spot instance instead. There are some caveats though.
- There are more steps needed in order to start a machine, since technically speaking, it is terminated instead of stopped when I have finished using the machine. It is OK. It can be simplified if you use a launch template to create the EC2.
- You may not be able to create the instance type at some point since you would need to compete on the price with the market. In my experience though, the server pool is pretty sufficient for me to launch an instance most of the time.
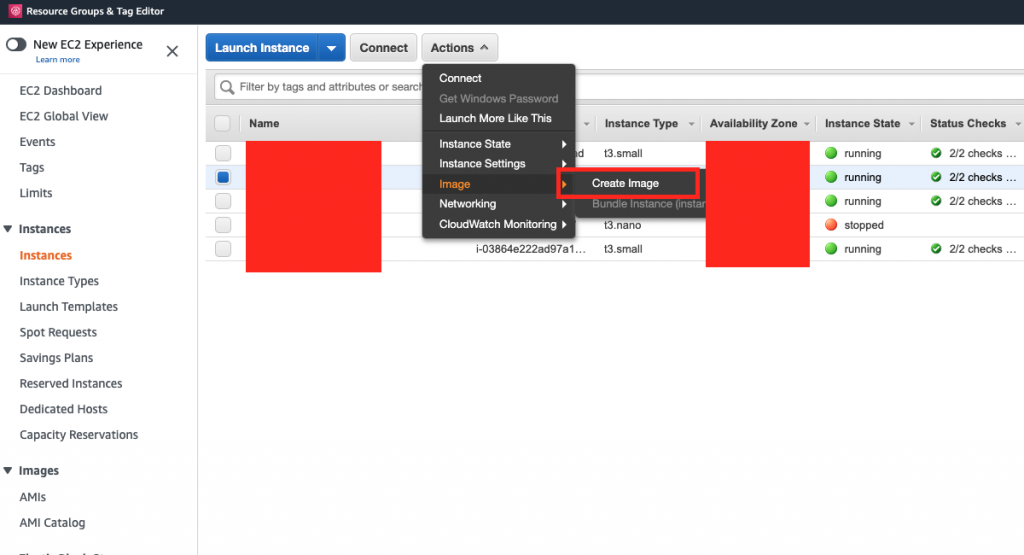
- When you want to save some system settings, you would need to build a new image such that the settings can be persisted. Based on my usage pattern, it is acceptable since I will not install new packages from time to time, just occasionally.
EBS for hosting the OS
The EBS has only 10GB in size. I use Ubuntu 20.04 as the host OS. After installing all the basic tools I needed, it consumes 3.6GB only while leaving 6.1G remaining. So I think 10GB is pretty good enough.
EFS for hosting project files
This is the best part. I host all the project files and the docker data directory in EFS. EFS is a rather new service from AWS. You can think of it like EBS, except that it can be attached to any EC2 instance, not just 1 instance at a time, but multiple instances. The underlying protocol used is Network File System version 4, meaning that it has a great support for existing tools. The best part of EFS is that it helps you transfer those inactive files to a lower-cost storage automatically. Thus, cost-saving is not something I need to handle by myself. I just need to configure once then I can forget it. Another great point is that it has unlimited storage space, such that I do not need to scale it up when the space is used up, like what I did for EBS.
How to setup
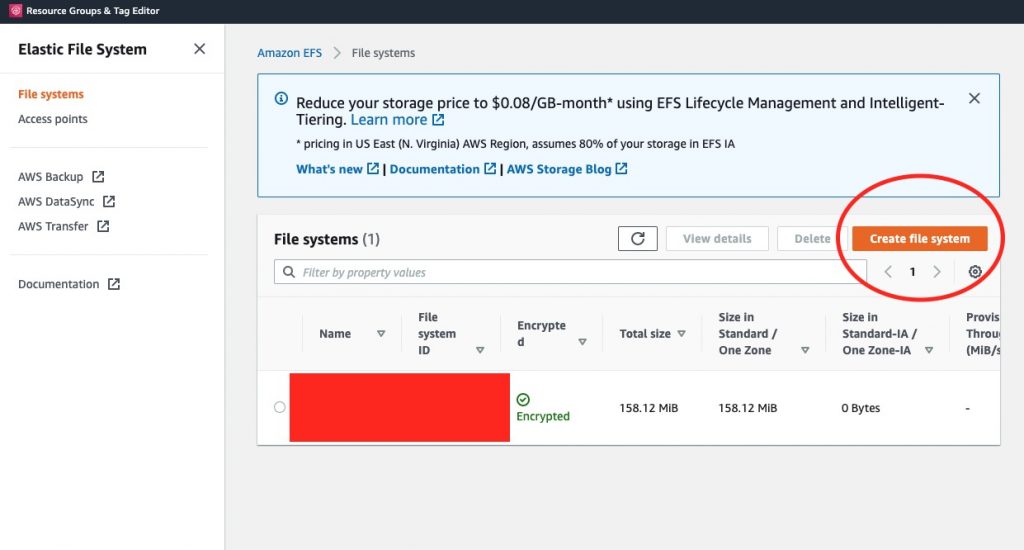
Here is a short tutorial of how to setup a development VM like I do. First of all, we need to create an EFS. Just like most AWS services, login to the console then create it inside the console.
Creating the EFS

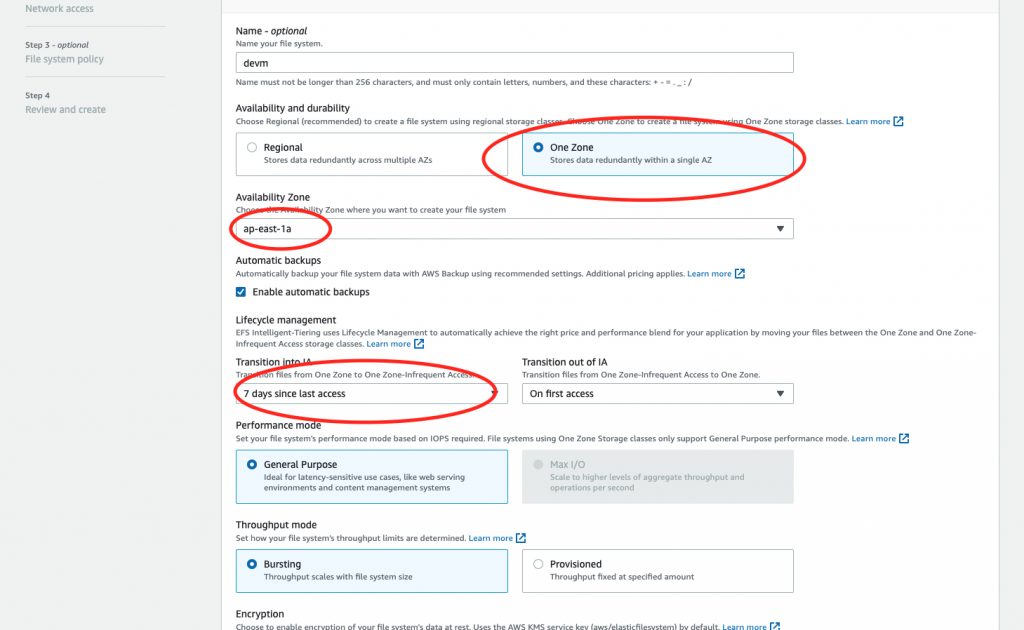
- I prefer storing stuff in one zone in order to cut cost further. The durability (11 9’s) and availability (99.90%) is good enough for me since I have enabled automatic backup and I will also “backup” in my git repo.
- Remember the availability zone here. You would need to specify that when you create the EC2 instance.
- I have set the “transition into IA” time to 7 days. I have no clue for what to set indeed, just trying to minimise it for saving cost.
Then just press “Next” until the end. For File system policy, I leave it as empty for simplicity. If you want to have a more secure system, you may need to take care of it.
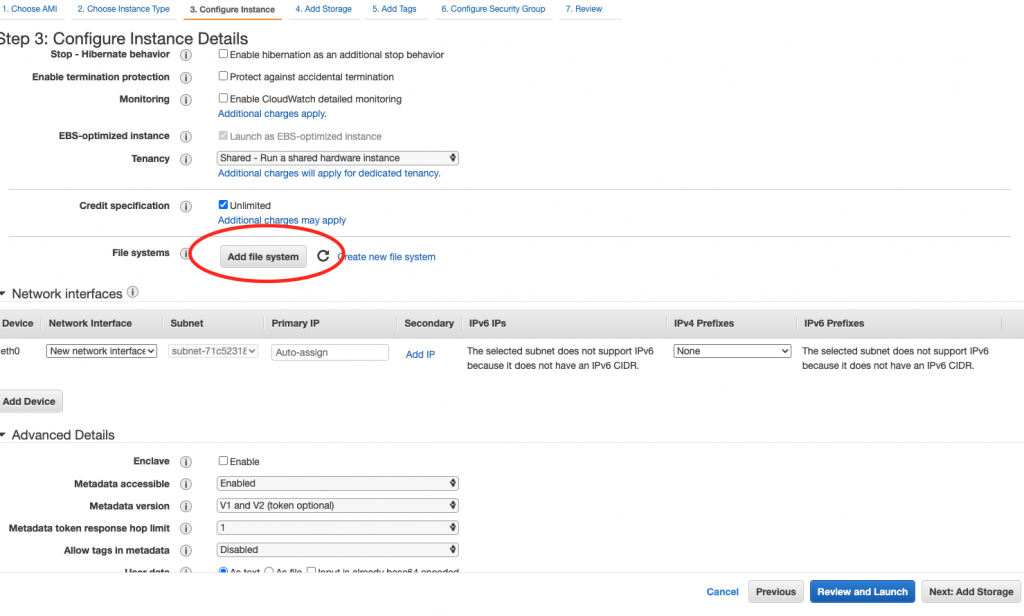
Create the EC2
I suppose this is rather standard, so I will not get into the detail too much. Just create an instance that fits your need. There are a few points to note:
- I use t3.small as a starter. Remember that you can always upgrade the instance type later. It is rather easy.
- Using spot instance like me would save you a lot of money. Though, it can be interrupted in the middle of your development, the chance is not that high in my experience.
- When choosing subnet, you need to use the one you chose for EFS such that you can mount the EFS to your EC2.
For other settings, I just keep the default ones. You may choose what fits you.
Up to this point, you should have an EC2 with EFS attached. There are a few more steps you would need to take care of though.
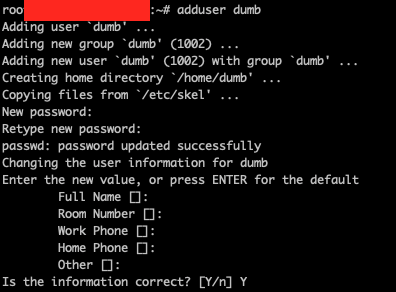
Prevent root access
In case you do not want to use root all the time, you may mount other folders from EFS with a new user.
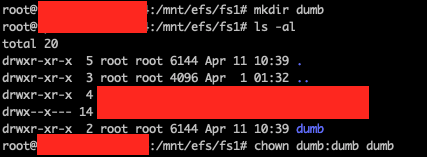
Then add an entry in /etc/fstab in order to mount it for every boot. The entry for me is something like this:
fs-xxxxxxxx.efs.ap-east-1.amazonaws.com:/dumb /home/dumb nfs4 nfsvers=4.1,rsize=1048576,wsize=1048576,hard,timeo=600,retrans=2,noresvport,_netdev 0 0
Remember that you need to set the EFS domain properly (instead of using fs-xxxxxxxx.efs.ap-east-1.amazonaws.com).
Then you can run the following command to mount the folder.
mount -a
docker data directory
If you use docker for development like me, you will also need to mount a folder for storing docker data instead of using the default folder (/var/lib/docker). The steps for mounting the docker data directory are pretty similar to mounting the user directory. Instead of creating a user, though, I simply create a folder “dockerdata” under /home and also a folder “dockerdata” under /mnt/efs/fs1. Then simply add an entry in /etc/fstab such that it will mount the folder for every boot.
fs-xxxxxxxx.efs.ap-east-1.amazonaws.com:/dockerdata /home/dockerdata nfs4 nfsvers=4.1,rsize=1048576,wsize=1048576,hard,timeo=600,retrans=2,noresvport,_netdev 0 0
Mount it with mount -a again. Then you would need to copy the existing docker data to this mounted folder.
cp -R /var/lib/docker/ /home/dockerdata
Now you would also need to tell docker to use this new folder instead of using the old folder. You can do so by creating a file “daemon.json” under /etc/docker.

{
  "data-root": "/home/dockerdata"
}
Now restarting the docker service and it will apply this new config.
docker does NOT support NFS well
(Edit: Apr 14, 2022)
I was happy using this VM until I have met an error.
failed to register layer: Error processing tar file(exit status 1): errno 524
Turns out NFS (the underlying tech used by EFS) is not supported by docker well. When the container gets bigger, I cannot run the container successfully and it shows the error above. Luckily, there is a workaround, i.e. using devicemapper as the storage driver. It can be easily configured in daemon.json by adding a line.
"storage-driver": "devicemapper"
The daemon.json will become something like this.
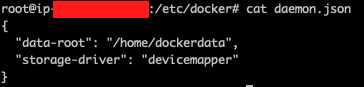
Restarting the docker service and it will apply the config.
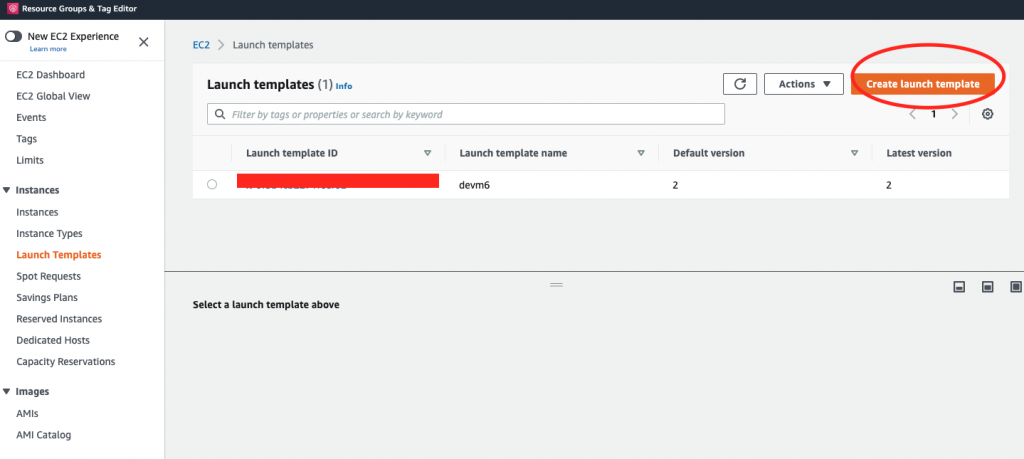
Create a Launch Template
Remember that I am using spot instance to cut cost? One of the problems is that there are quite many steps to create the instance every time. In order to simplify it, I have created a launch template as well.
A few settings you would need to take note:
- AMI, choose the one you created in step 1
- Subnet, stick to the zone where you created the EFS
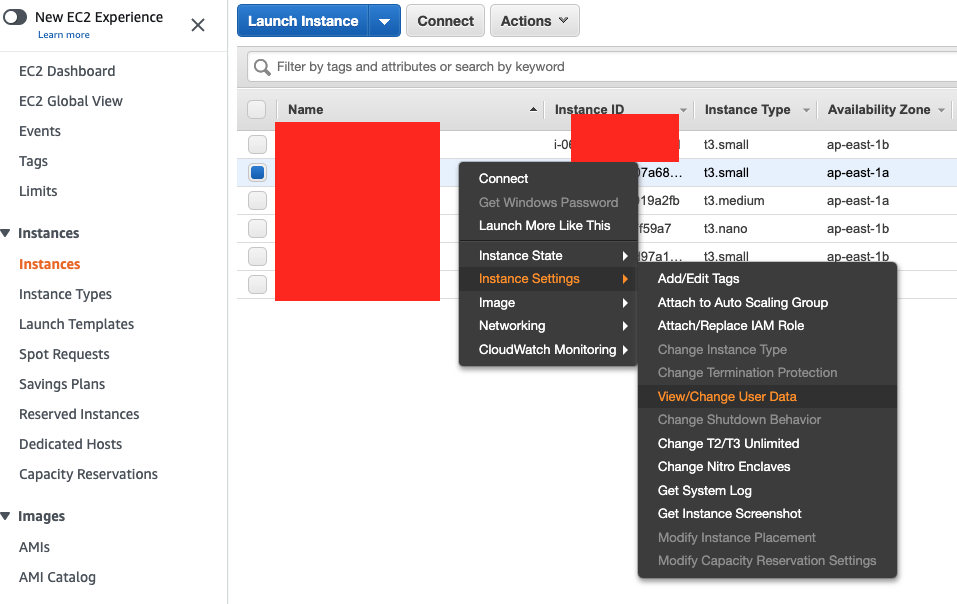
- You need to fill in User data in order to mount the EFS (AWS does not provide a systematic way to mount EFS in launch template at the moment). You may find the User data by right clicking the EC2 instance -> Instance Settings -> View/Change User Data. Then copy and paste the whole bunch of script to the User data block inside Advanced details in Launch template.
So next time, if you want to launch the development VM, simply launch it from template. This will speed up a lot the creation process of the EC2 instance.
DDNS setup by using Cloudflare
I have not requested for an Elastic IP, but I would still like to have some sort of static “IP”. I used the docker image timothymiller/cloudflare-ddns to update the DNS for me. The idea is that this script runs periodically to get the public IP of the EC2 spot instance and update the DNS record in Cloudflare by API.
The setup is simple. Copy the docker-compose.yml from the github repo. Create a config.json and update the API token and zone ID in it. Then run docker compose.
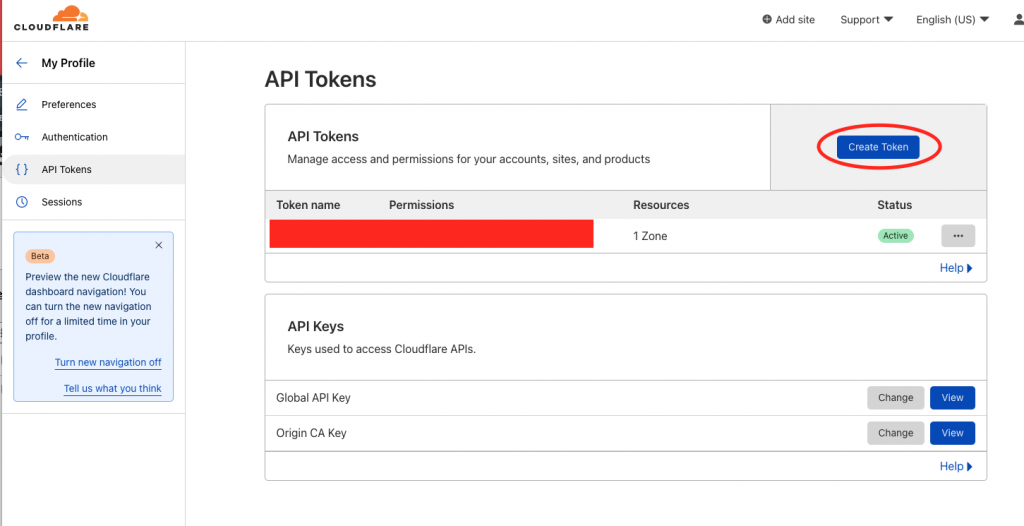
To get the API Token from Cloudflare, visit the API Tokens page.

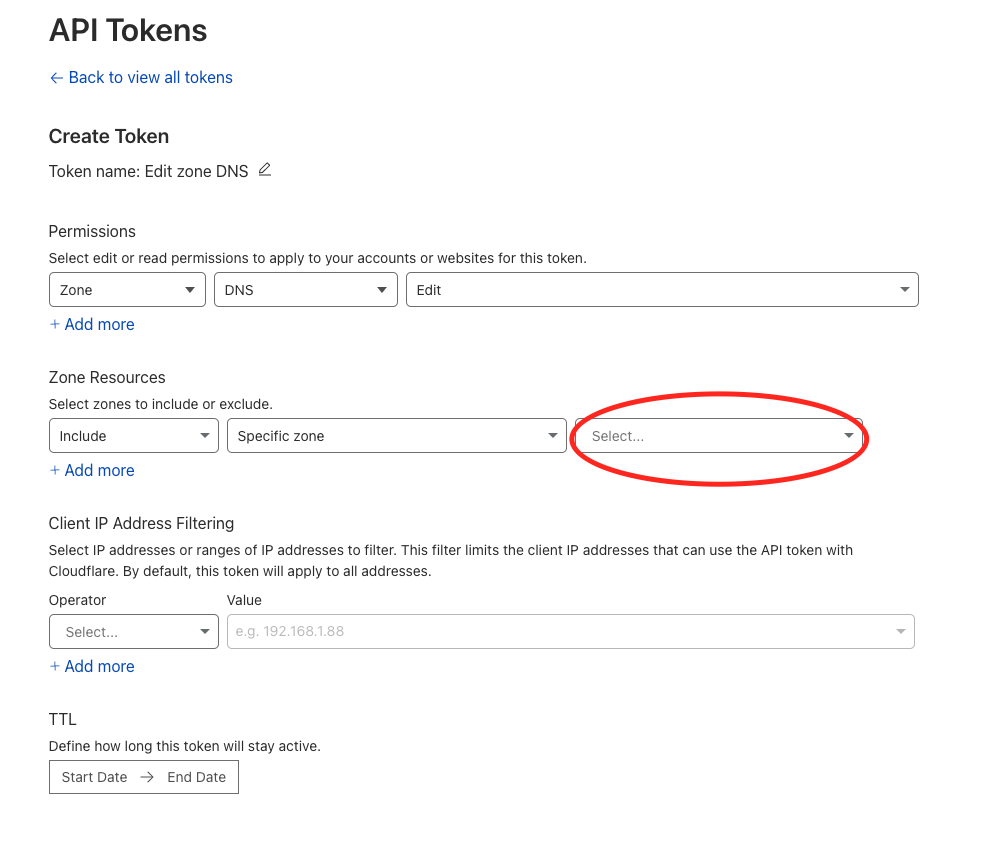
After setting up the API token, you would also need the zone ID from Cloudflare. You may find it in the domain page.

After locating the API token and zone ID, you can setup the docker image by copying the docker-compose.yml file from the github repo. The content would look like the below.
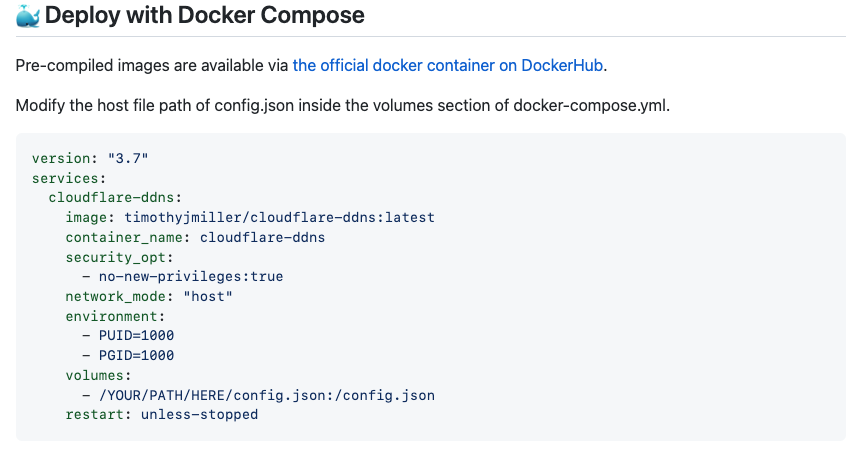
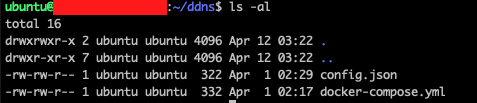
Remember you would need to update the config.json path in volumes section. For me, I put the config.json in the same directory as the docker-compose.yml file, so the path would be ./config.json. The content of config.json would look like this.
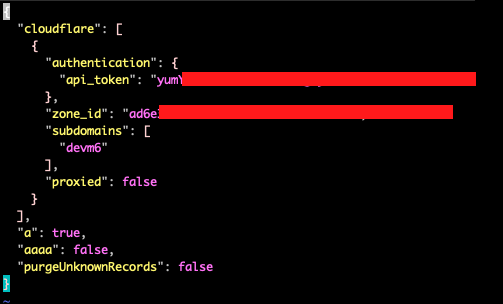
Remember to change the API token and zone ID in the corresponding field. You also need to set the subdomain that you would like to point to your VM. For me, I set it to be devm6.
Run the following command to start running the script.
docker-compose up -d
Final words
So, this is basically how I setup my development VM. After balancing the cost and convenience, the final setup is EC2 spot instance + EFS. The fixed cost is rather low, which is the EBS price. The variable cost charges me only if I am using it. Comparing to the old way I used before, i.e. EC2 and a large EBS with almost half un-used space, the cost saving could be up to 50%. In terms of convenience, I just need to start and stop the EC2 instance with 1 click. Now I would need to launch the instance from template and terminate the spot instance by canceling the spot request. That is slightly more complicated but it is acceptable. The cost justified these few more clicks. I am pretty satisfied with that.